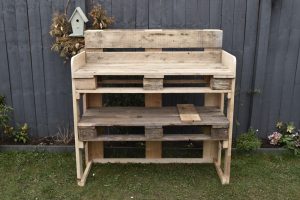
Upcycled Pallet DIY Potting Table
It’s been a few months since I got my beloved Allotment and in that time we’ve made a great start at transforming the plot from a muddy and overgrown site into a fully functional flower farm! When planning out the plot and the raised beds I decided to leave a space in one of the corners so that I would have room for a little potting area. After pondering some different ideas, my husband and I decided we would have a go at making a potting table for it! We already had some pallets and odd bits of wood lying around and after a little scroll on Pinterest I was inspired and ready to give it a bash!! By using pallets to make your own DIY potting table, there are already built in shelves and loads of little spaces for seed trays, tools and all the gardening bits and bobs you could ever need! I am absolutely delighted with how ours turned out and am amazed at how easy it actually was. Here I’ve shared a step by step tutorial so that you can have a go at making your own DIY Potting Table too!
You will need:
Two large wooden pallets
Some lengths of wood
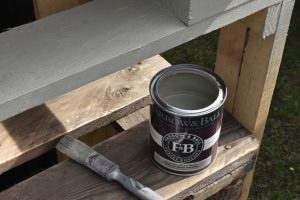
Exterior wood paint, I used F&B French Gray
A saw, drill, measuring tape, pencil, screws and sander
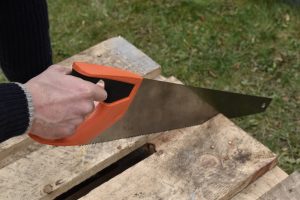
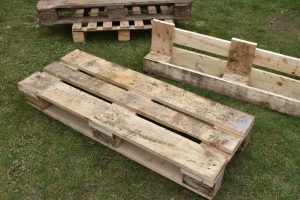
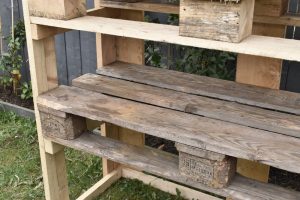
Step 1. Lay down your pallets outside ready for chopping up. Use a saw to cut below the third slat of wood so that it is divided into two halves, one half with three slats and one half with two slats. The larger piece with the three slats is going to be the table top of the top level of your potting table.
Step 2. The smaller piece with the two slats is going to be the raised back of the potting table, so it needs to be turned upwards at a 90 degree angle and screwed on to the back of the table top in that position. Use four screws along the back at each side to ensure it is nice and sturdy.
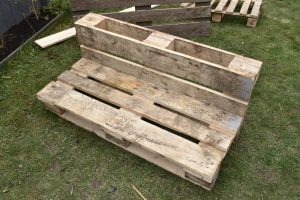
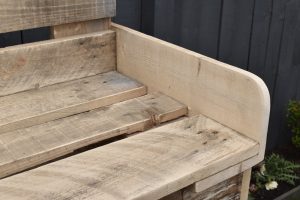
Step 3. Measure a flat piece of wood for each of the side edges of your potting table top. Cut to size and attach with screws side on so that your potting table top now has a ledge at each side.
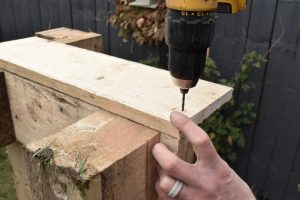
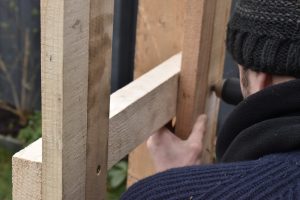
Step 4. Turn the top section of your potting table upside down so that you can attach the legs. We measured our potting table legs out so that the table top came up to the same height as just above my waist, so measure according to whichever height you desire! Mark the bits of wood for the legs with a pencil and saw to size. Attach them to the sides of the table top and add a pice of wood across the sides and back for support. We used whatever bits of wood we already had in the shed for this so just screwed two thinner bits together for each leg!
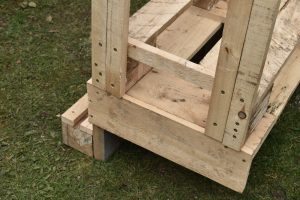
Step 5. Measure where you would like your second shelf to go. We made it about half way between the ground and the table top, so measured slightly below that taking the width of the pallet into account. Measure out a piece of wood for each of the inner sides of your potting table for your second shelf to sit on. Secure them into position with screws.
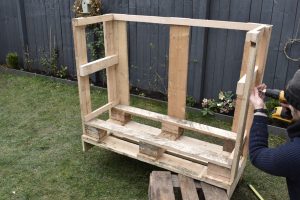
Step 6. Flip the potting table right side up, onto its lovely new legs. Divide your second pallet as before, with three slats on one piece and two on the other. Slide the three slated pallet onto the shelf ledge and secure into place with screws. Your potting table structure is complete, just like that! Now it’s time for some ascetic improvements, but it will be perfectly functional finished at this step!
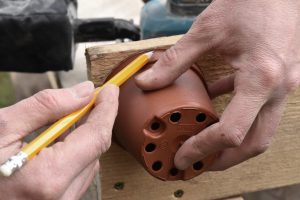
Step 7. Use a plant pot as a template to round off the edges of the potting table top sides. You can use a saw or a sander to then follow the line to create a nice rounded edge.
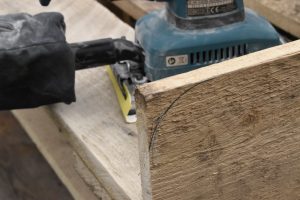
Step 8. Give the potting table a once over with a sander for a smooth finish and a nice even surface for your paint to work with. We used an electric sander, but a rough piece of sandpaper would do the job just as well with a little bit of elbow grease!
Step 9. Last but not least, paint! This is where you can really transform and add a bit of personality to your very own DIY Potting Table! You could tone it down or go wild, with endless colour options available out there! I used Farrow and Ball exterior paint in French Gray as I’ve decided it’s going to be my allotment colour, with a coordinating picket fence and flower boxes next on the agenda!! Farrow and Ball is definitely a pricier paint but they have such an incredible range of outdoor colours, it’s eco friendly, water based and the quality really is excellent.
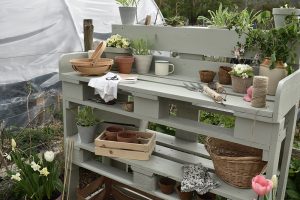
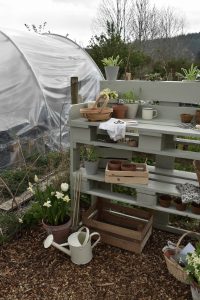
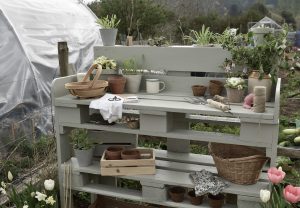
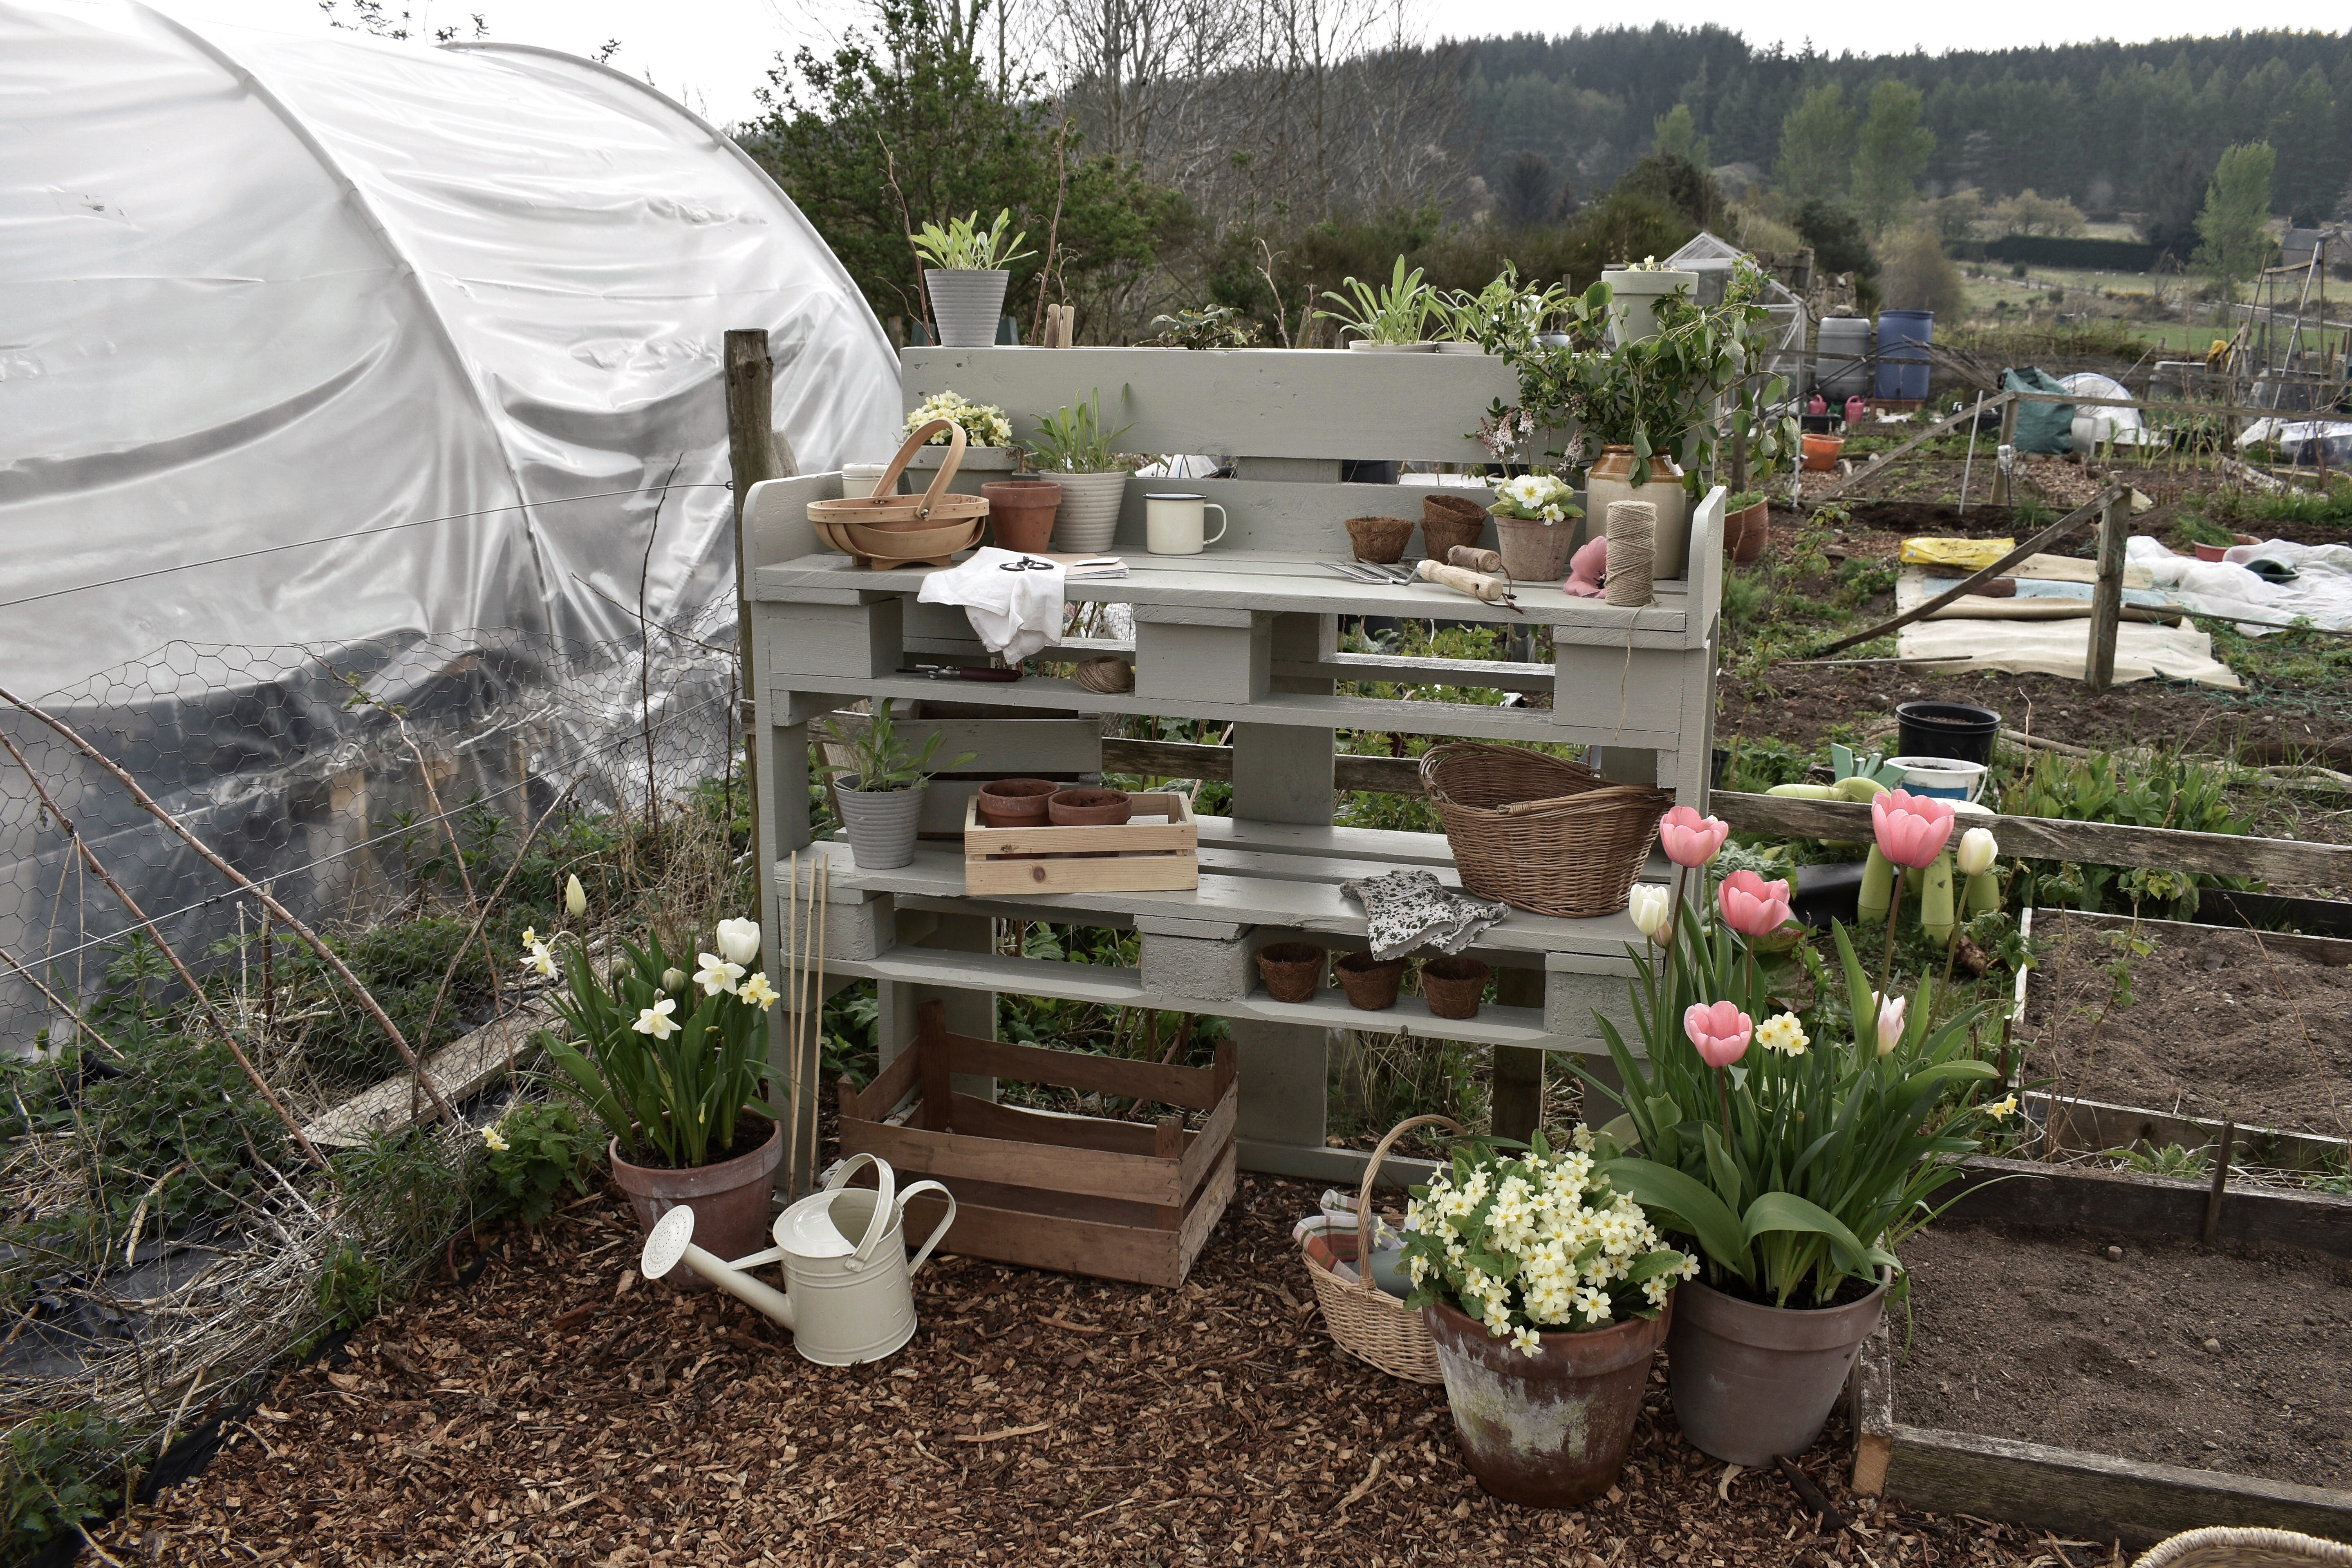
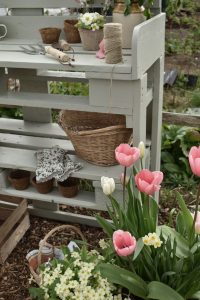
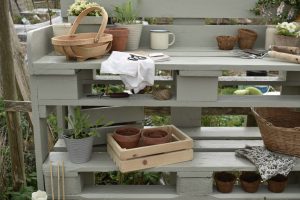
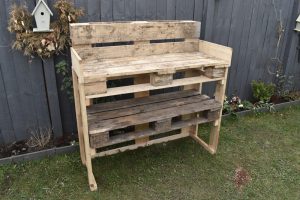
My finished potting table is now in pride of place in the corner of my allotment where I spend endless hours potting on seedlings, arranging homegrown flowers and pottering around in my element! I just love all the nooks and crannies for tools, seed trays and even plants in the built in planter up the top! It really has been such a fun project to work on over over the past few weeks with Mr Stin and I am over the moon with how it turned out. It’s already become a well used and much loved addition to my allotment! Now maybe one for the garden too?!
Hollie x